Basis-Setup
Set up account default settings
In order to be able to use the Sales Hub in HubSpot successfully, some basic settings must be managed beforehand. These are under "Settings" (cogwheel symbol at the top of the bar).
You can customise the time zone, language, currency, and date and number format of the account in HubSpot. If you are an account administrator, you can set a default for these settings for all new users in your account. The language and date and number format settings can also be customised on a per-user basis.
Please read the detailed instructions for updating your language and country settings here: https://knowledge.hubspot.com/account/change-your-language-and-region-settings
The corresponding settings can be managed here: https://app.hubspot.com/l/settings/account-defaults/general
Configuration of the security options (2FA/SSO)
Normally, you only need your username and password to log in to HubSpot. With two-factor authentication (2FA) enabled, logging in requires verification via a second device, such as your mobile phone. Because logging in with 2FA requires access to a physical device, the risk of a potential intruder gaining access to your account is much lower.
We recommend that all portals consider enabling 2FA: https://knowledge.hubspot.com/account/how-can-i-set-up-two-factor-authentication-for-my-hubspot-login
Activate this in your portal here:
https://app.hubspot.com/portal-recommend/l?slug=user-preferences/security
For Enterprise HubSpot customers who use single sign-on in their company, learn more about configuring this feature with HubSpot here: https://knowledge.hubspot.com/account/can-i-use-single-sign-on-sso-with-hubspot
Activate this in your portal here:
https://app.hubspot.com/portal-recommend/l?slug=user-preferences/security
Create and invite users
To use HubSpot, each team member must have a user account created in their name and be invited to join HubSpot. From there, they can create their password, update their profile and start working in HubSpot.
When creating user accounts for individual team members, you can update their permissions to grant or deny them access to certain features in HubSpot.
Detailed instructions on how to create new users can be found here: https://knowledge.hubspot.com/settings/add-and-remove-users
Detailed instructions on managing permissions in HubSpot can be found here:
https://knowledge.hubspot.com/settings/hubspot-user-permissions-guide
Make here: https://app.hubspot.com/portal-recommend/l?slug=settings/users
Create and assign teams
With Teams in HubSpot, you can organise your users into groups for organisational and reporting purposes. If you are an Enterprise user, you can also create a team hierarchy by setting up "parent-child" relationships between your teams.
Read more about creating and editing teams here:
https://knowledge.hubspot.com/account/create-and-manage-teams
Do this: https://app.hubspot.com/portal-recommend/l?slug=settings/users/teams
Customise the branding for your sales tools
Customise the company logo, standard colours and company information displayed in meeting links, sales documents and offers.
You can find detailed instructions on how to customise the branding for your sales tools here: https://knowledge.hubspot.com/account-settings/edit-your-logo-favicon-and-brand-colors
Do this: https://app.hubspot.com/portal-recommend/l?slug=settings/account-defaults/branding
Set up and adjust deal pipelines and deal stages
Deal pipelines can be used to predict sales and identify obstacles in your sales process. Deal stages are the steps in your pipeline that signal to your sales team that a sales opportunity is moving towards closing. Tracking the progress of your deals in your deal pipeline gives you a more detailed picture of your expected turnover in a given period.
Watch this video to learn how to implement your sales process with HubSpot CRM: https://app.hubspot.com/academy/l/lessons/365/1987
Detailed instructions on how to configure deal pipelines and phases can be found here: https://knowledge.hubspot.com/crm-deals/set-up-and-customize-your-deal-pipelines-and-deal-stages
Do this: https://app.hubspot.com/l/sales-products-settings/deals
Create custom call and meeting types
Create custom types for calls and meetings to get a better overview of how your sales team spends their time.
Detailed instructions on how to create types for calls and meetings can be found here: https://knowledge.hubspot.com/meetings-tool/how-do-i-create-and-use-call-and-meeting-types
Do this: https://app.hubspot.com/portal-recommend/l?slug=settings/objects/activities/calling
Setting up the profiles
Customise the basic information for each user's HubSpot profile, such as a personal picture, profile name and CRM email signature, as well as the settings for HubSpot notifications. Every Sales Hub user must complete this task, regardless of whether they have a paid sales seat or not!
Detailed instructions on how to update user profiles and settings can be found here: https://knowledge.hubspot.com/account/profile-and-preferences
Do this: https://app.hubspot.com/portal-recommend/l?slug=settings/user-preferences/basic
Connect Inbox and Calendar
To send emails to contacts via the CRM or to use the sales tools in your email inbox, HubSpot needs permission to connect to your inbox.
Detailed instructions on how to connect your email inbox can be found here: https://knowledge.hubspot.com/email-tracking/connect-your-inbox-to-hubspot
The bidirectional integration of Google Calendar and Office 365 Calendar with HubSpot allows you to simultaneously log a meeting in your CRM, create a calendar event for that meeting, and send invitations to meeting guests. In addition, when you create a meeting event in Google Calendar or Office 365 Calendar with a HubSpot contact, the event will appear in the contact's timeline.
Detailed instructions on how to synchronise your Google or Outlook calendar can be found here: https://knowledge.hubspot.com/integrations/use-hubspots-integration-with-google-calendar-or-outlook-calendar
Installing the HubSpot Sales Extension for Outlook or Gmail
With the HubSpot Sales Chrome extension for Gmail, the HubSpot Sales Office 365 add-in or the HubSpot Sales Outlook desktop add-in, you can access your sales tools directly from your inbox.
Detailed instructions on how to install the HubSpot Sales extension for Outlook if you use Outlook on a PC and the HubSpot Sales extension for Chrome can be found here: https://knowledge.hubspot.com/connected-email/how-to-install-hubspot-sales
Installation of the HubSpot CRM App
With the HubSpot mobile app, you can use HubSpot's marketing and sales tools on the go. The HubSpot mobile app can be installed on iOS devices with iOS 11 or higher or on Android devices with Android 5.0 or higher.
Detailed instructions on the functions of the mobile app can be found here: https://www.hubspot.com/products/mobile
Detailed instructions on how to install the HubSpot Mobile App can be found here:
https://knowledge.hubspot.com/mobile/how-to-install-the-hubspot-mobile-application
Deals
One of the most important points in HubSpot's Sales Hub are the deals. To use these, click the sub-item "Deals" under "Sales". This will first bring up a dashboard based on the selected pipeline. The pipeline selection can be found at the top left, as shown in the following screenshot:
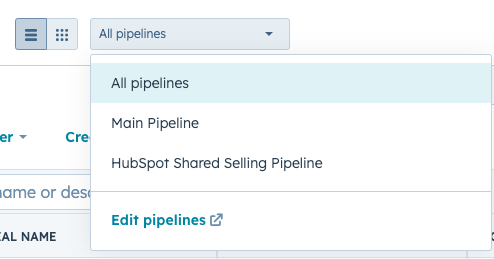
By clicking on "Edit Pipelines", new pipelines can be created. It is also worth mentioning that the board actions can be found on the right-hand side of the dashboard. Here, the dashboard or the dashboard of the pipeline can be adjusted as desired. You can also edit the cards of the individual deals that appear on the dashboard of the respective pipeline here. Once you have clicked on "Edit Pipelines", the following overview appears:
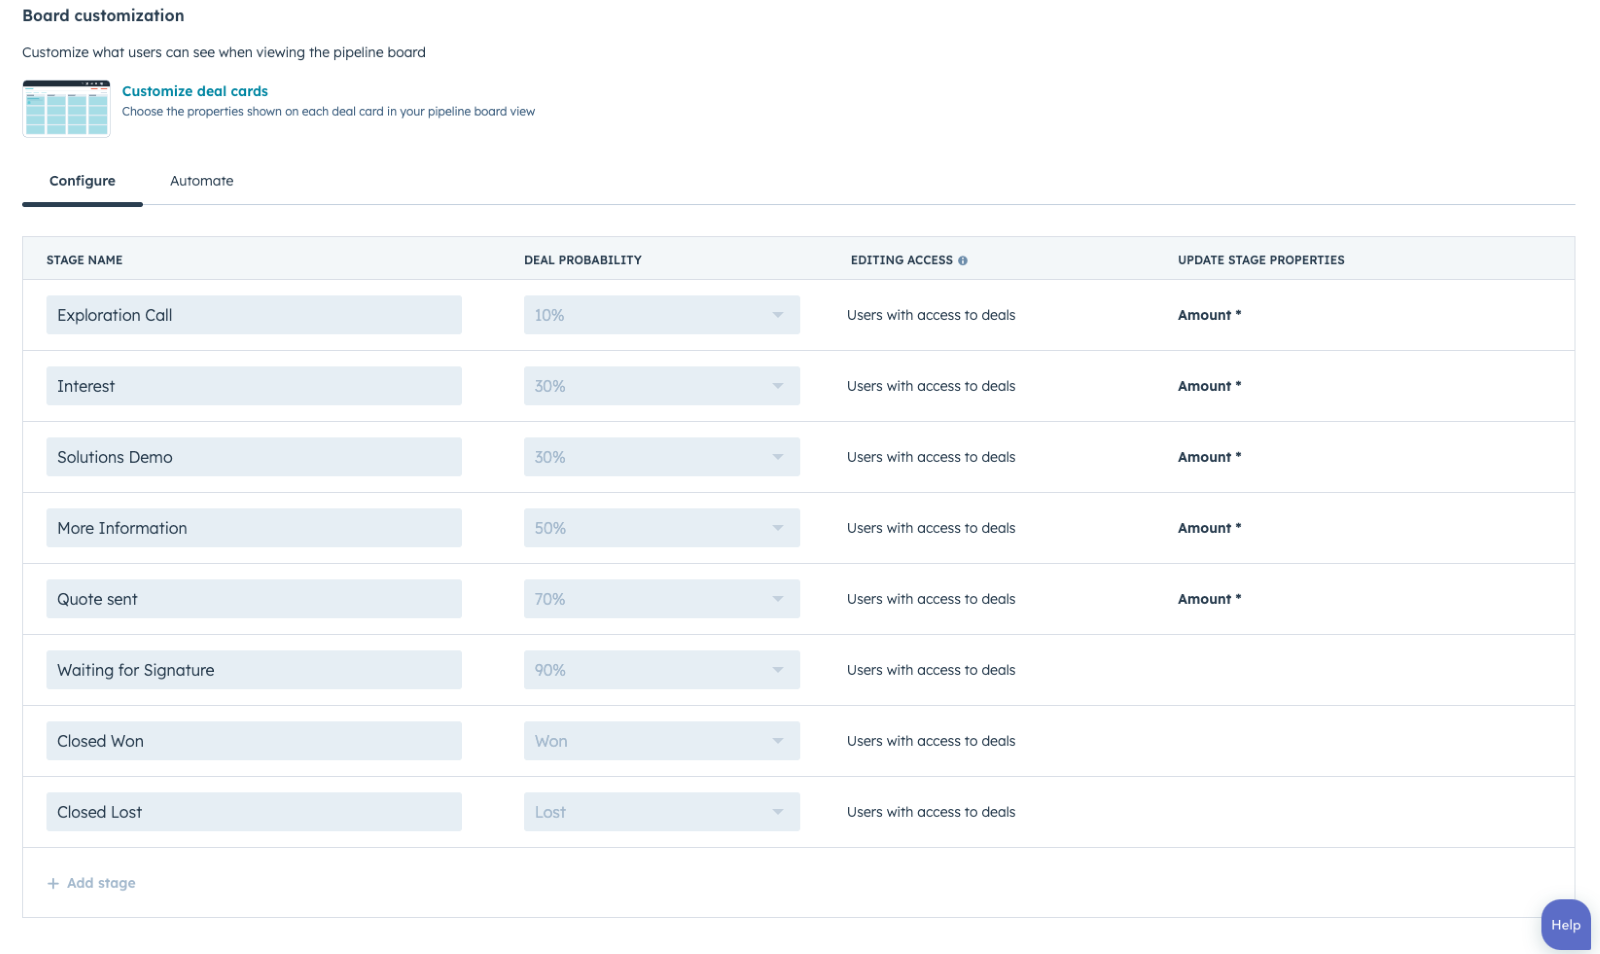
Depending on which pipeline has been created, it can be configured quite easily. All you have to do is enter the name of the phase and the deal probability. By clicking on the "Automate" tab, each individual phase of the deal pipeline can be fully automated. For example, e-mails can be sent or tasks can be automatically assigned to employees.
Tasks
Based on the deal pipelines created, tasks can be assigned to different people. To do this, simply click on "Tasks" under "Sales". The following overview appears:
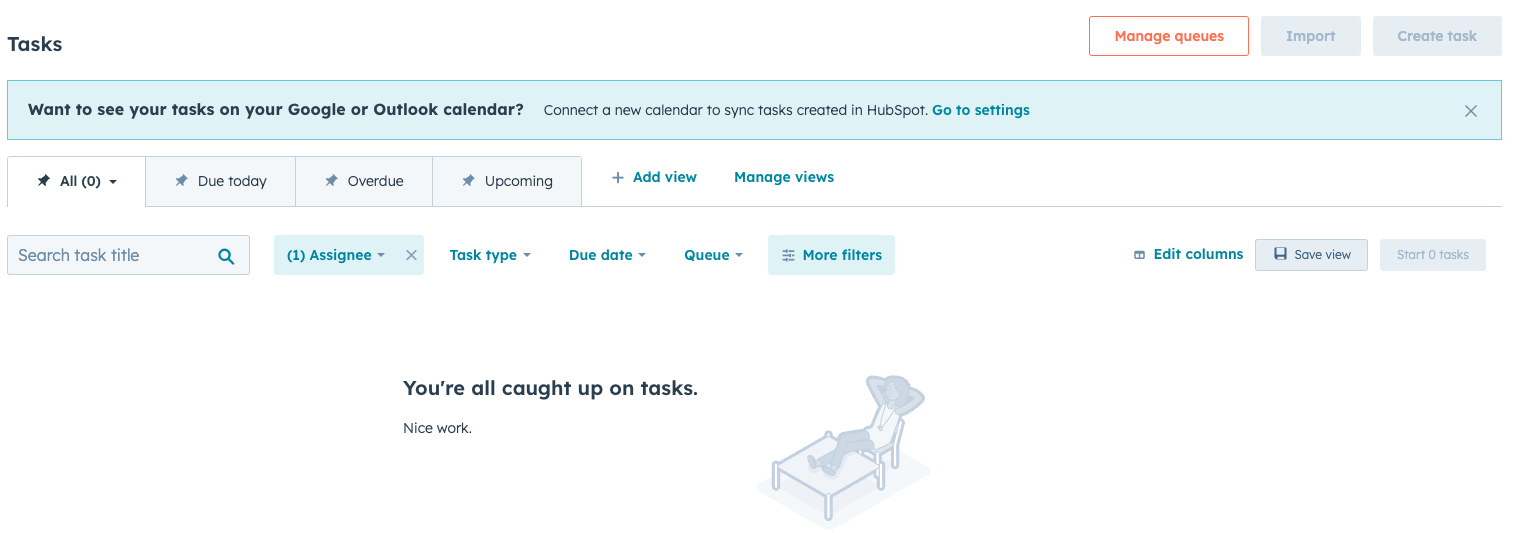
There are different views here. In the general overview, all tasks are displayed. However, these can also be displayed individually for the respective employee. In addition, tasks that are due today, overdue, pending and most active or completed can also be filtered. Tasks can, for example, be assigned via workflows within as well as outside the deal pipelines. All that is required is to use the action "Assign task" in the respective pipeline phases or workflows.
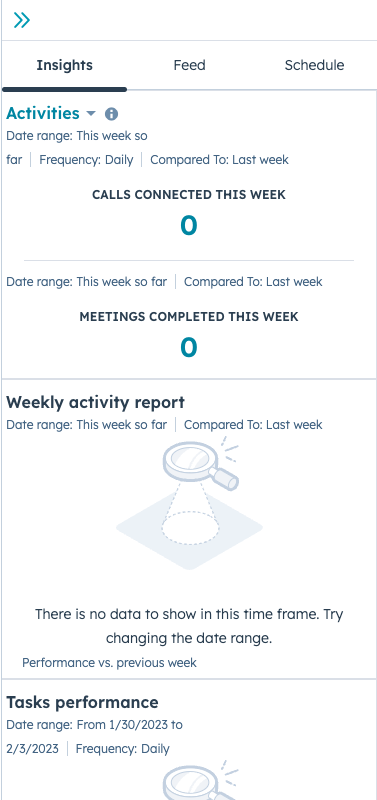
There is also another window on the right-hand side:
There, the tasks can be further analysed. For example, it shows how many tasks have already been completed and which tasks are still pending so that they can be scheduled if necessary.
Documents
Under Sales and Documents, all files required for use within HubSpot can be uploaded and saved. To do this, simply click on "Upload document" (top right) for a better overview.
Meetings
Under Sales and Meetings, it is possible to create online meetings for various employees. These can then be booked and created automatically. There are also options to set up a 60-minute, 30-minute or 15-minute meeting:
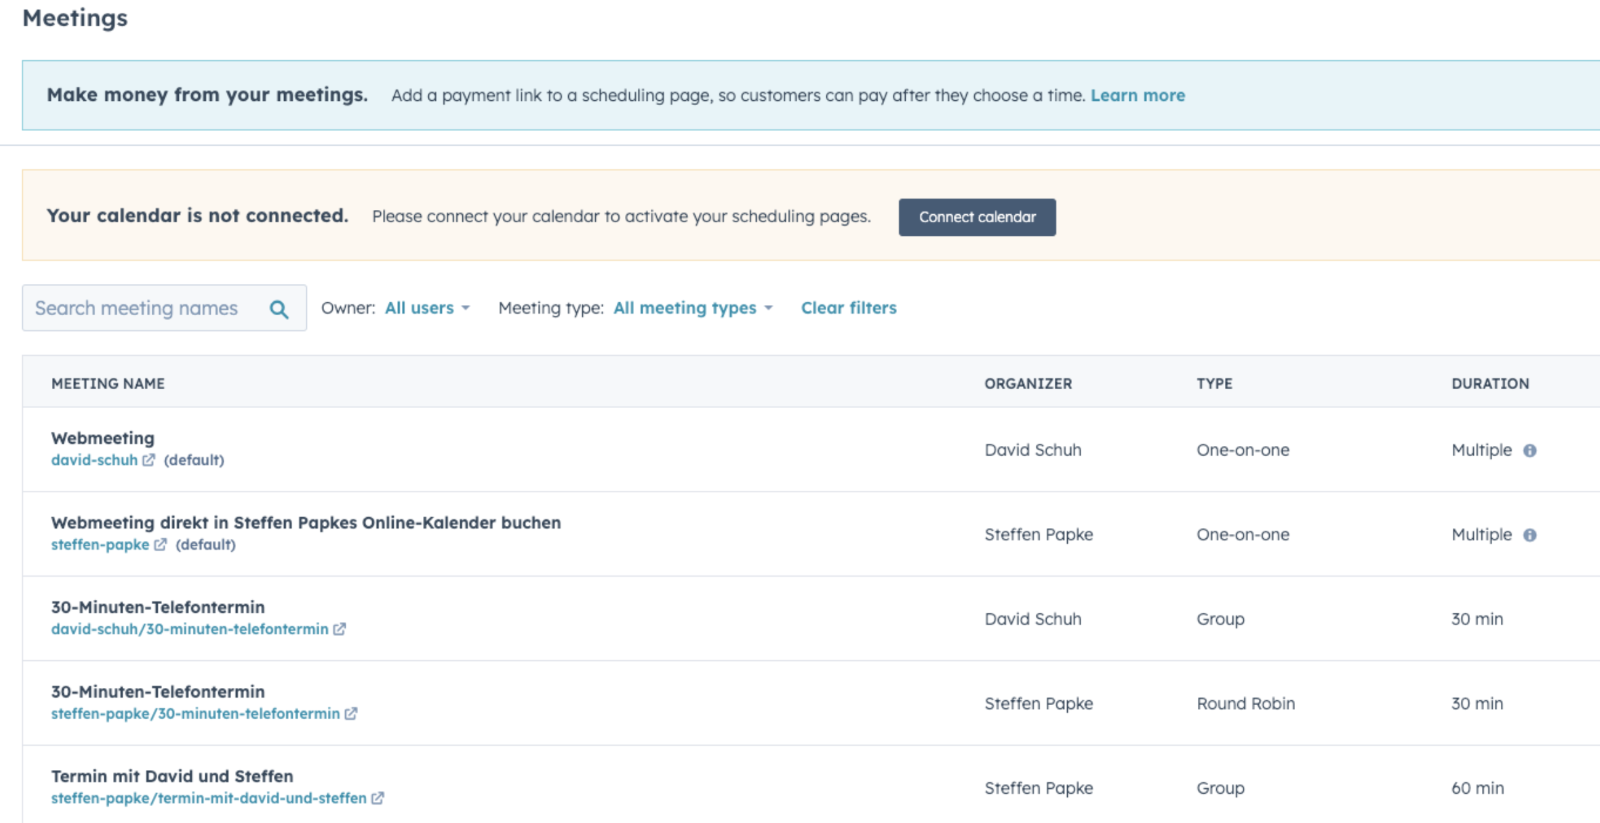
In order to be able to use the tool, a calendar must first be linked with HubSpot. For this, the respective mailboxes of the employee must be linked and HubSpot then automatically synchronises the calendar of the mailbox. Once the mailboxes are linked with HubSpot, any meetings can be created. Clicking on "Edit" takes you to the following page:
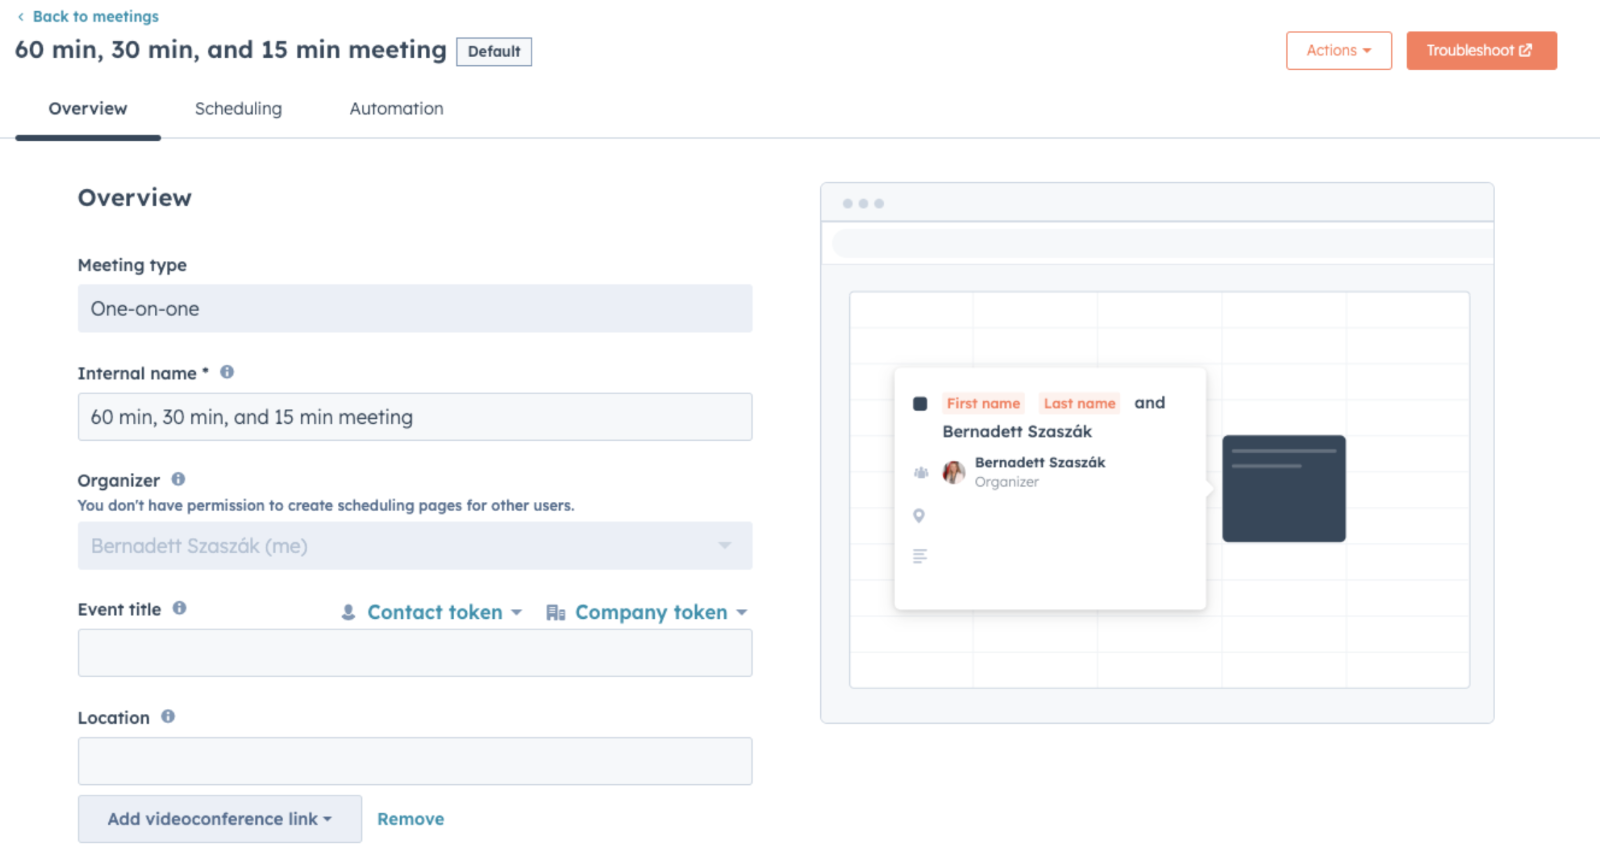
In this overview, the name, title and location of the meeting can be set. HubSpot offers the possibility to set up meetings for Zoom or Microsoft Teams. To link one of these apps, a new user account must be added under the following link: https://app.hubspot.com/integrations-settings/4717385/installed/microsoft-teams/home/users?accountId=d4bb94eb-d274-43a6-8a42-cfbe02ec0467
At the end of the overview, the meeting type can be selected. Here, HubSpot distinguishes between the options pre-qualification, first outreach and demo.
The next step is to customise the scheduling page and the form page:
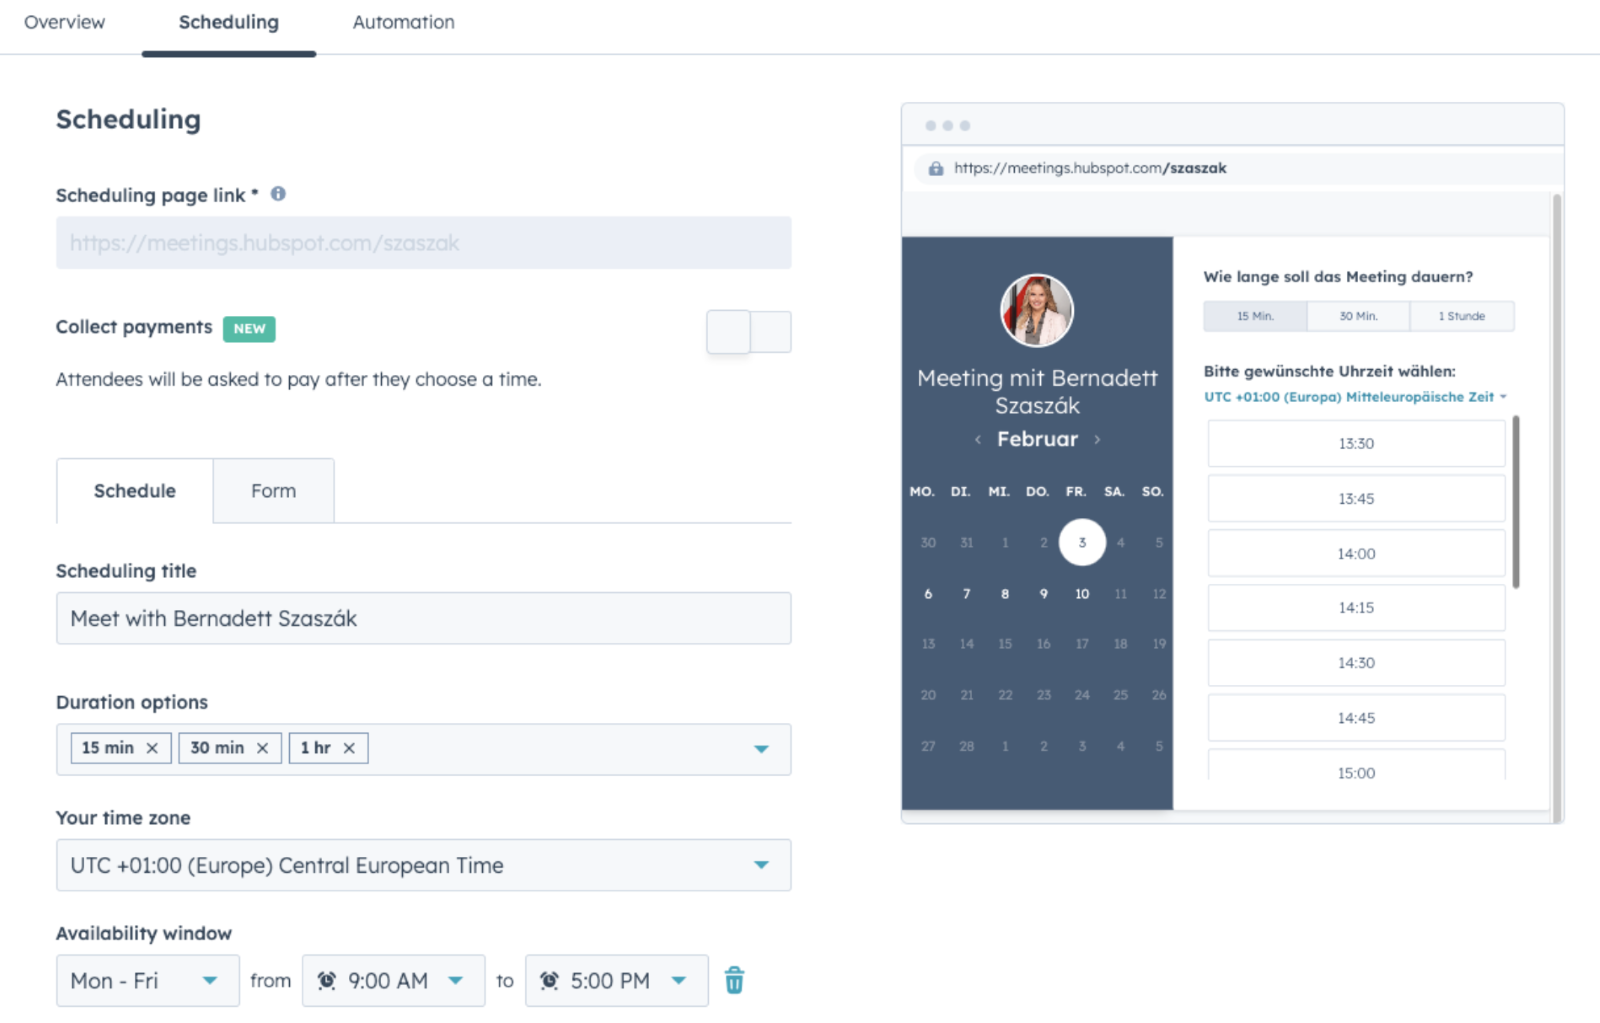
The title of the scheduling page is set here. In addition, the duration of the meeting can be set. The corresponding time zone and availability window must also be set.
In the last step, the automation rules are defined:
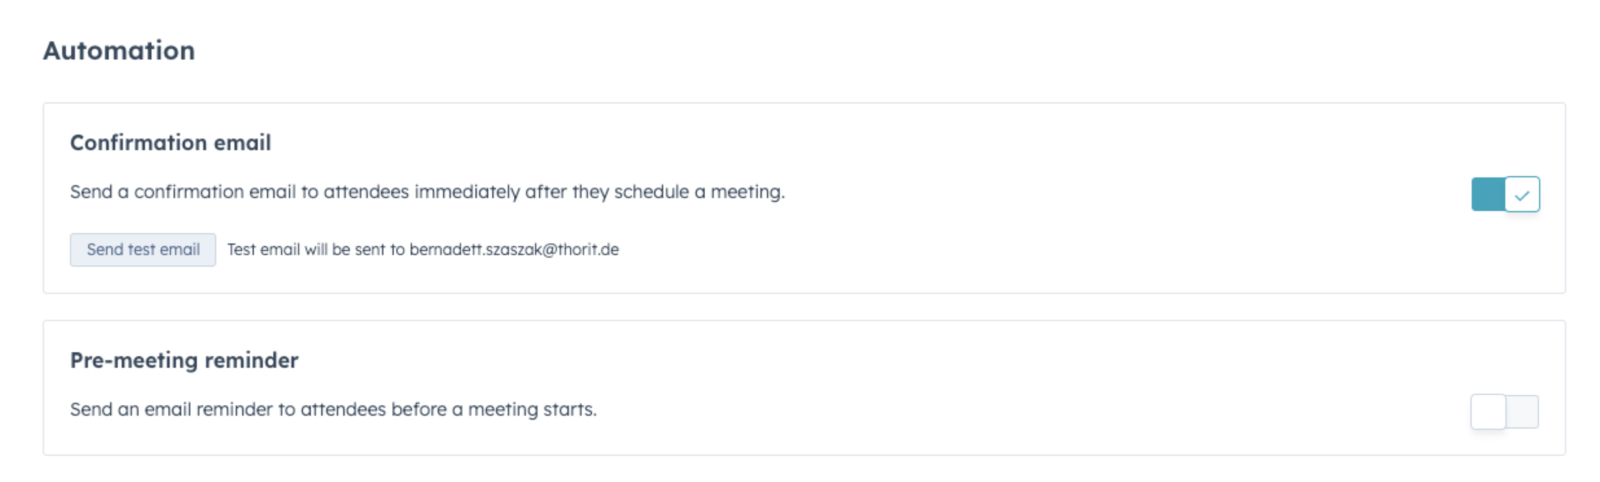
As a rule, the confirmation e-mail should always be activated here to inform the contact person that the agreed appointment will take place or that the booking has been received by the employee. In addition, a reminder can be sent to the contact person immediately before the meeting.
Payments
Under Sales and Payments, HubSpot also offers the option to add payment links to sell products and close deals. This can be added to any web page, for example. The so-called Buying Journey lets you better manage the aspect of the payment process:
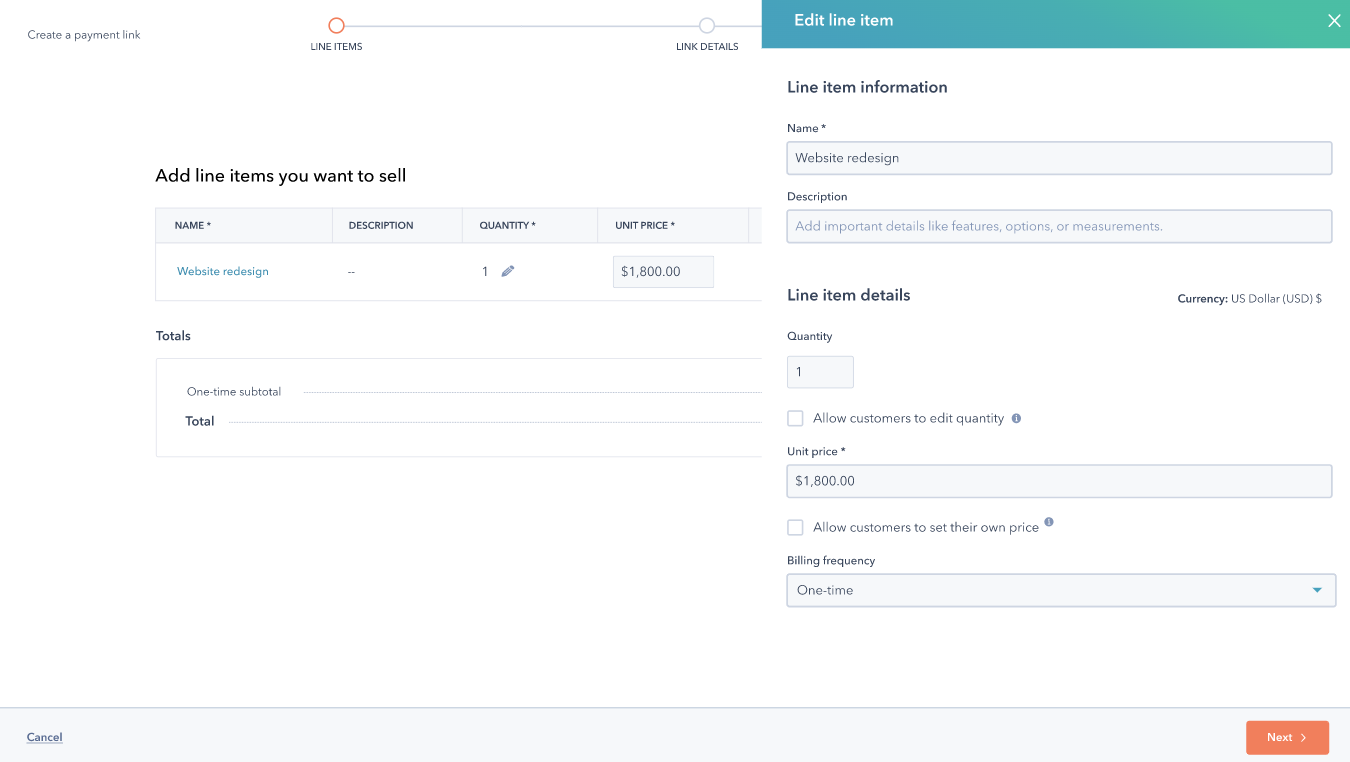
The purchase process is a self-contained process and is to be implemented in several steps. A demo shows the way how a HubSpot Payment can be set up from start to finish: https://app.hubspot.com/payments-demo/4717385/products
Guidelines
Another function of the Sales Hub is the creation of guides. This is a library of best practices and resources for sales. This is also comparable to a FAQ. Questions are collected and all employees can make notes on them in order to build up a knowledge database for the sales team.
Offers
In the last step, offers can be managed. Similar to the meetings tool, the individual steps must be worked through.