- A conversion is a target activity that you define.
- Conversion tracking can be used to identify profitable activities on the website, such as purchases, registrations, or filling out a form.
Requirements for setting up conversion tracking:
- Your website must have the conversion tracking code, called the Meta Pixel, inserted.
Creating the Meta Pixel:
- Open the Events Manager.
- Click the green + Connect Data Sources, select Web, and then click Link.
- Select Meta Pixel and click Link.
- After reading the information, click Next.
- Give your pixel a name (for example, [company name]'s pixel).
- Click Next.
Add the Facebook pixel to the website:
After you create the pixel, you are presented with several options to add the pixel to your website:
Manually add to website:
- Go to the Events Manager.
- Select the pixel you want to add to your website.
- Click Add Events and From a new website.
- Select Add pixel code to website manually.
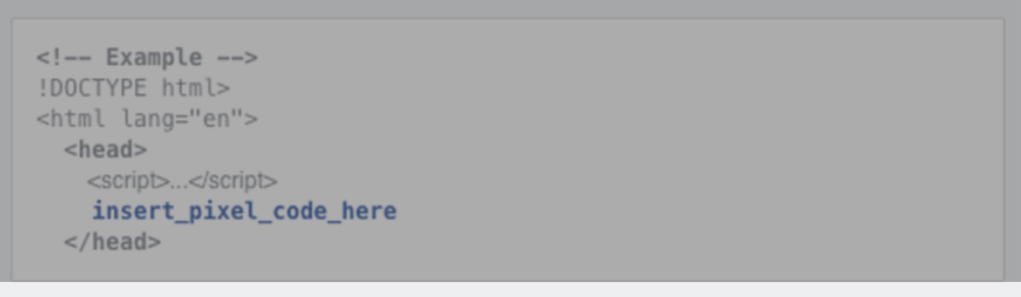
- Copy the pixel base code.
- Then paste the base code at the bottom of the header area, just above the closing "head" tag (</head>).
- Click continue
Use partner integrations
- Go to the Events Manager.
- Select the pixel you want to add to your site.
- Click Add Events and From a new website.
- Select Use partner integration.
- Select the partner from the list.
- Follow the instructions below.
Forward instructions by email
- Go to the Events Manager.
- Select the pixel you want to add to your website.
- Click Add Events and from a new website.
- Select Send instructions by email

- Now they can email the installation instructions to the relevant contact to install for you.
If you need assistance creating or installing the pixel, feel free to contact us.