Via the "Marketing" tab, e-mails can be compared, edited and created under the item "E-mail".
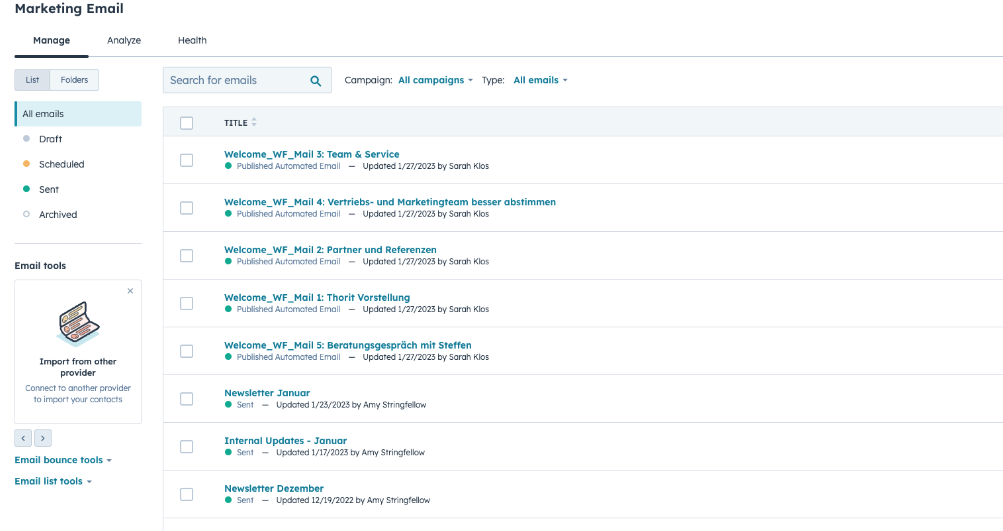
Under "Manage" you get an overview of all mailings. The left column always shows the respective status of the e-mails. In this example, all e-mails have already been sent. The e-mails can be selected and sorted individually.
At the top right, a new e-mail can be created by clicking on the button "Create e-mail".
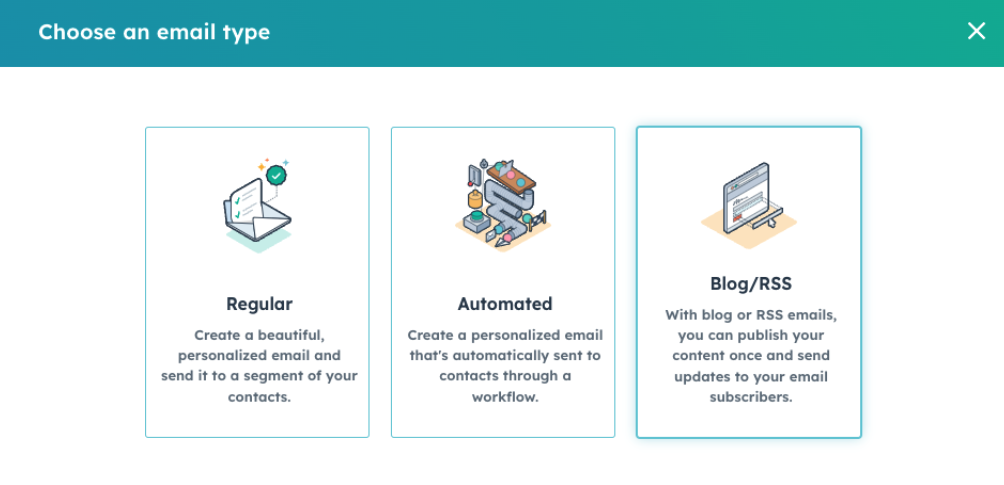
Different e-mail types are suggested. The following types can be selected:
- Regular
- Automated
- Blog/RSS
Regular: Regular, personalised emails can be created here to be sent to a specific customer segment.
Automated: These are basically the same as a normal email, but they are only sent within a workflow.
Blog/RSS: With this type of email, content is published only once and all email subscribers are notified of updates.
Since emails are mostly created in connection with workflows, in this case select "Automated".
In the next step, a corresponding template can be selected. Prefabricated templates can be saved. In addition, HubSpot offers several options, as can be seen in the following image:
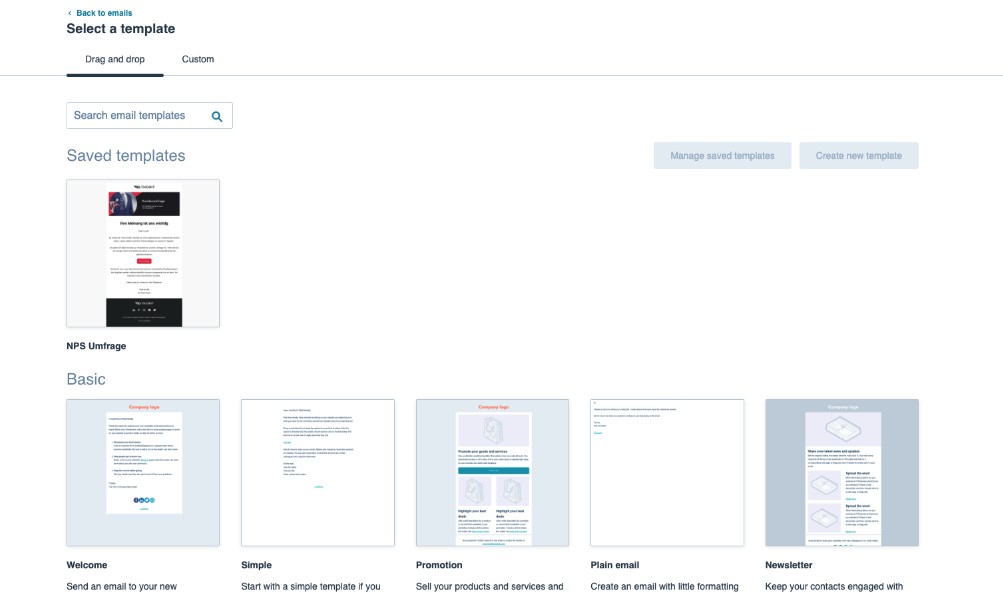
HubSpot already offers templates for welcome emails, promotions, newsletters or simple emails. Once you have selected a template, you can access the drag & drop editor.
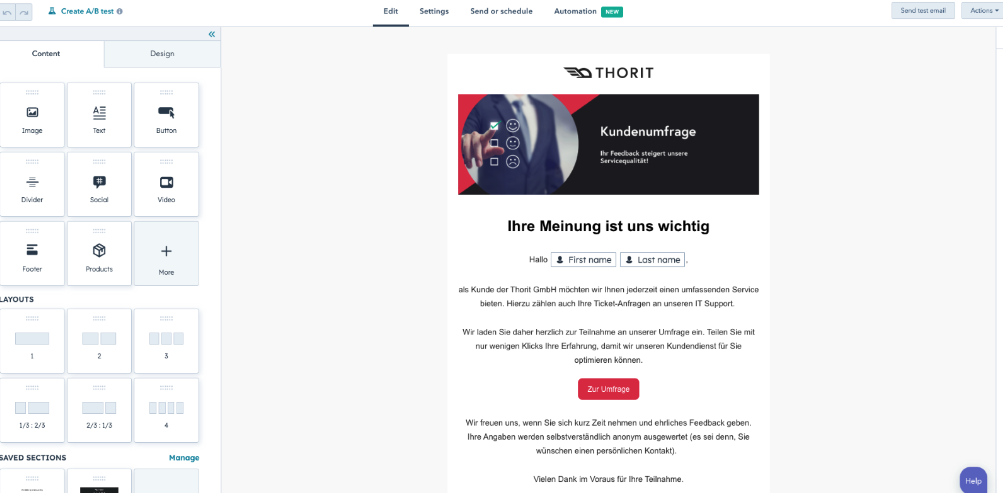
In the left column, there are several widgets that serve to create the email. No matter whether individual elements such as image, text or videos. The layout can also be customised. In addition, selected sections can be saved via the "heart symbol" so that they can be used with drag&drop. The sections are added to the favourites via the heart symbol in the blue frame. In addition to the content, text colour and font size can also be adjusted under Design.
IMPORTANT: If you want to go back one step in the editing process, please only click on the arrow symbols and not on "Back"! On the other hand, it may happen that the progress of the created e-mail is not saved. Click on "Back" to return to the general overview.
After that, the settings still have to be adjusted:
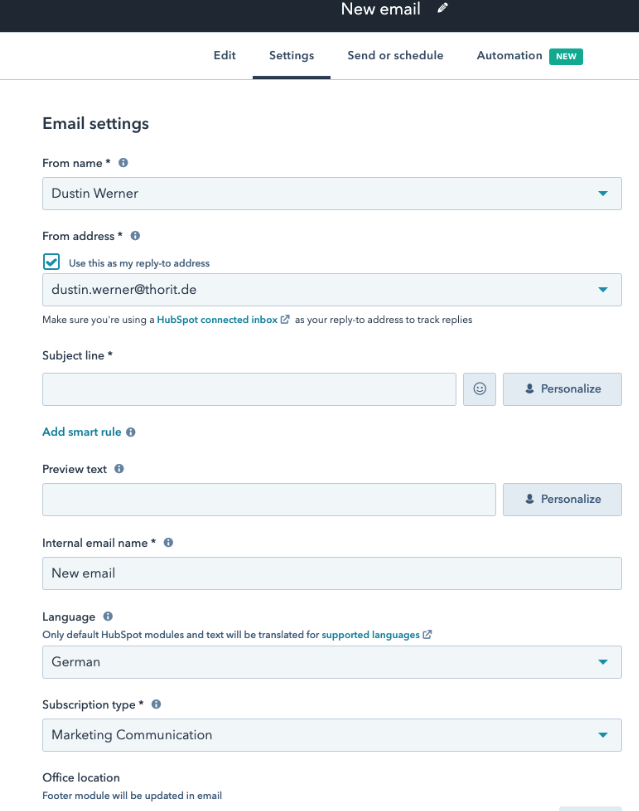
Sender name, subject line and preview text can be adjusted here.
Finally, the e-mail must be sent. Another setting can be made here:
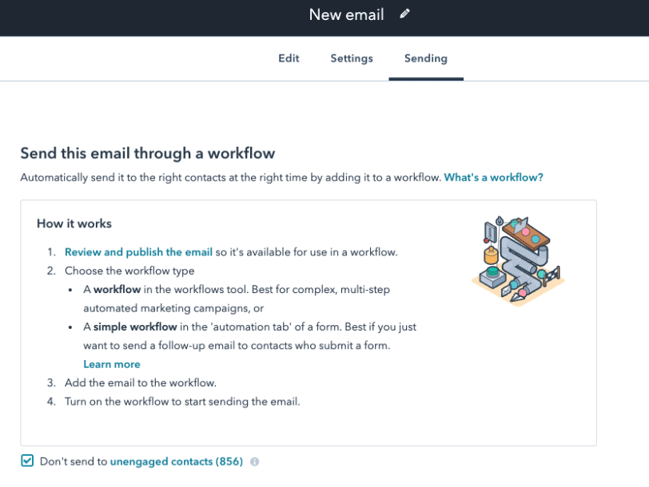
In order to send the email to relevant and active contacts, it is possible to avoid that contacts with low interaction receive the created email by selecting the field shown.
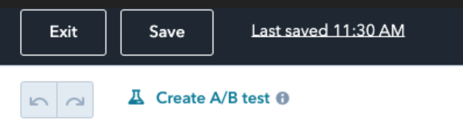
HubSpot is also a powerful tool in terms of evaluation. If one goes back to the overview page of the emails, A/B testing can also be carried out at the top right next to the creation of an email under the button "Compare emails".
Any emails can be selected to be compared.
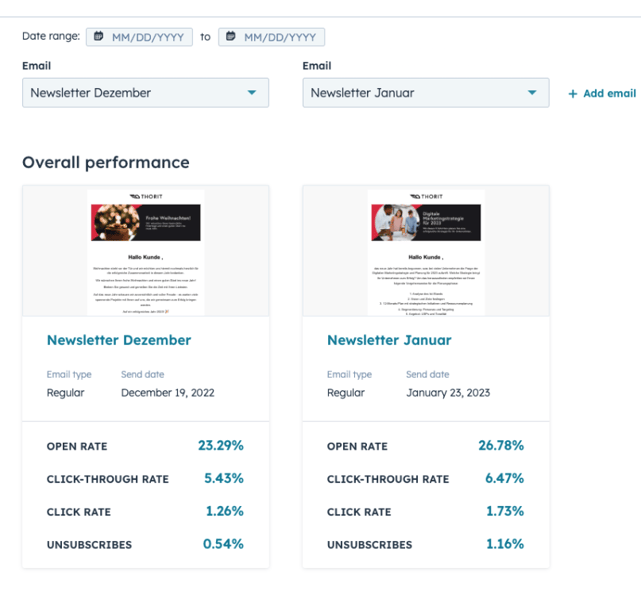
If you go back to the main overview, you can also take a closer look at the overall performance of all emails over specific periods of time under "Analyse" in the top left-hand corner.